Calling all home renovators and design lovers! Are you ready to embark on an extraordinary journey of creativity and imagination? Meet Midjourney, the revolutionary AI image inspiration tool that will transform the way you approach home renovation and decor projects.
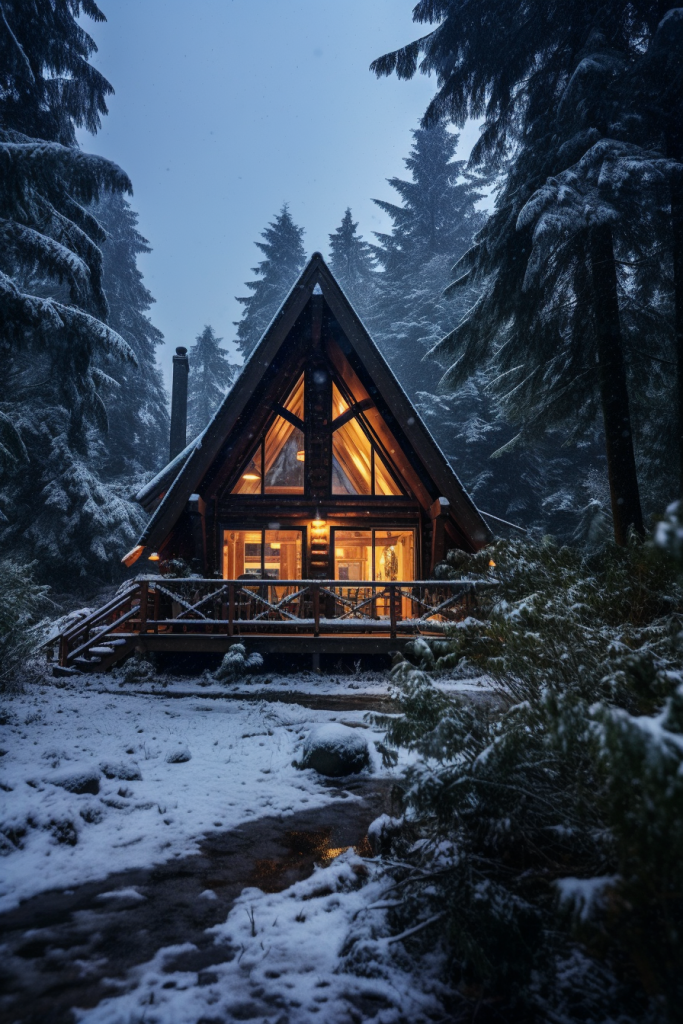
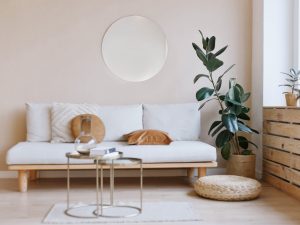
Finding the perfect inspiration to kickstart your design process can be a daunting task. Midjourney comes to the rescue with a game-changing solution that will spark your creativity and take your design vision to a whole new level. And guess what else? I actually created every photograph in this blog post using AI.
I’ll take you on an exciting journey into the world of generative AI. We’ll explore the incredible capabilities of this AI-powered platform, from generating highly customised visuals to helping you craft the perfect prompt to achieve your dream design. Let’s dive right in!
Table of contents
Get ready for a meaty blog post that will equip you with everything you need to create amazing AI interior images. If you’re new to generative AI, no worries — I’ve got you covered from start to finish. Alternatively, if you’re already familiar with the topic, feel free to jump straight to the section you’re most interested in. Happy reading!
- My own AI adventure
- Understanding Midjourney: the AI inspiration tool
- How to get started with Midjourney: a step-by-step guide for total newbies
- The craft of “Prompt Engineering” for interior inspiration
- Exploring the image generation process
- Complete sample workflow in Midjourney
- Embracing creative freedom with Midjourney
- Your next step with generative AI
My own AI adventure
AI has been around for some time. It’s a broad term encompassing anything that involves artificial intelligence processing. Over the last few years, I’ve been using AI tools to make my life easier. They help turn my blog posts into social media-ready content, write engaging introductions and conclusions, and even suggest catchy article titles. These tools can even write entire blog posts! Even though you can sometimes tell. They’re perfect for purely informative purposes, but not so great when you want to connect with your audience (that’s you — hello!)
But then, in 2022, everything changed when ChatGPT came onto the scene, providing one of the most advanced AI tools right in the palm of your hand. At the same time, image generation tools have also stepped up their game, using clever AI models that can create content that would have seemed impossible just a few years ago. It’s fascinating to see how generative AI is here to stay.
Now, I get it. Some designers might feel a bit worried about AI’s impact. But let me assure you, AI is going to revolutionize many industries in the next few years. You’ve got two choices: either embrace this change and become a master of this new technology, using it to your advantage, or resist it and miss out on the exciting possibilities.
Remember when the internet became popular? It transformed how we shop, and brick-and-mortar stores had to adapt, offering online shopping or unique in-store experiences to stay relevant. Well, we’re about to experience another seismic change. Some say it’s already happening. AI’s capabilities are growing exponentially, and it’s going to be a game-changer!

Understanding Midjourney: The AI inspiration tool
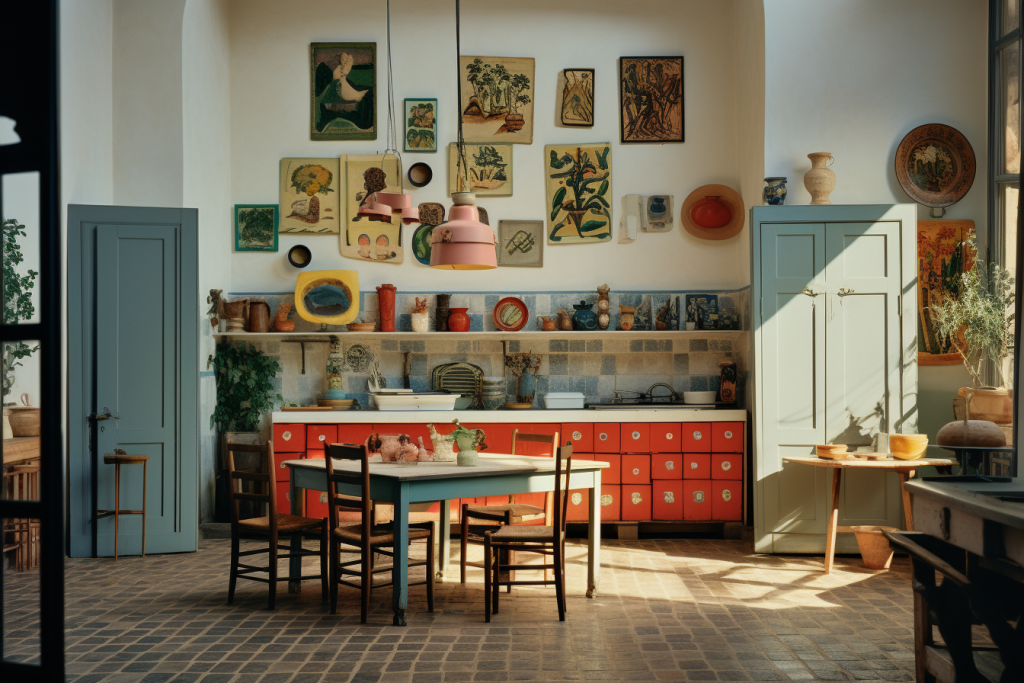
Midjourney is an innovative AI platform that generates high-quality visuals. Though it’s not specifically designed for interiors, the tool has learned a thing or two by analysing millions of images from various sources: decor magazines, blogs, books, etc. You name it! This makes it a lifesaver for home decorators, designers, and creators looking for unique inspiration.
Forget about spending hours browsing the internet for the perfect images. With Midjourney’s generative AI, you get highly customized visuals that precisely align with your design vision. No more tedious tasks of cutting photos from magazines or endlessly scrolling through the same regurgitated images on Pinterest. AI is the perfect partner to complement other sources of interior design inspiration.
At its core, Midjourney operates as a generative AI model, using prompts to generate images. These prompts act as instructions for the AI, describing the desired style, colours, lighting, and other elements you want to see in the images. The craft of “prompt engineering” is essential to maximize Midjourney’s power and achieve the results you desire — or at least come as close as possible.
Communicating with AI via prompts
Prompts are the essence of Midjourney’s creative process. By thoughtfully crafting your prompts, you can guide the AI to produce images that match your ideas. The AI’s ability to accurately understand and interpret your prompts is the key to achieving the best possible results.
Let’s take a look at an example of a prompt. This may look strange, but I’ll go into it in more detail later. For now, have a look at the three stages involved:
- The idea of what you want to see:
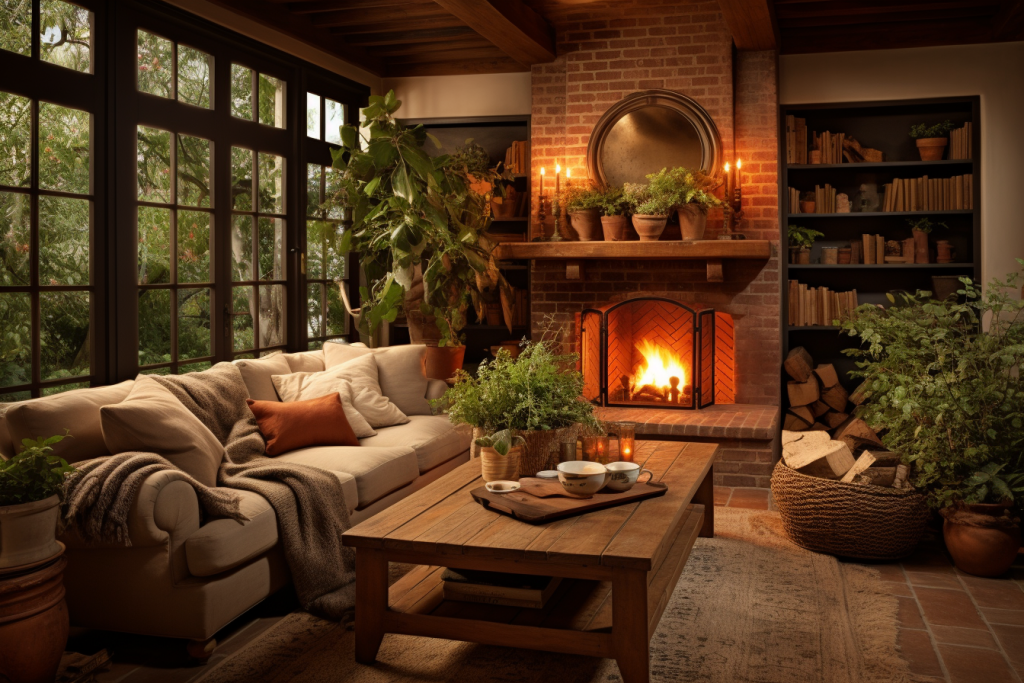
A cosy, rustic living room with warm earth tones, wooden accents, and soft lighting. - The prompt explaining your idea in detail:
/imagine a cosy living room with rustic decor. Use warm earthy colours like terracotta, olive green, and deep brown. Incorporate wooden furniture and soft, ambient lighting to create a warm and inviting atmosphere. Show the room from a slightly elevated perspective, emphasizing the comfort of the space. Add a touch of nature with potted plants and botanical artwork. - The image that Midjourney generates as a result:
Exciting, right?
Alternatives to Midjourney: exploring free options
Before we dive into the step-by-step guide to creating inspirational images with AI, let me share some alternative tools with you. While Midjourney offers one of the best AI-driven design inspirations out there, I understand that joining a paid plan might be a barrier for some. It’s essential to consider free alternatives that still get the job done.
Now, full disclosure, I haven’t personally tried all the tools listed below, but they do offer free versions with some limitations. Explore these options and find the perfect fit for your creative needs:
While these alternatives may not match the power and versatility of Midjourney, they offer opportunities for experimentation and creative expression. You can apply all the knowledge and some of the techniques from this blog post to these free alternatives and continue improving your image-generation skills.
How to get started with Midjourney: a step-by-step guide for total newbies
Are you ready to kick off your inspiration quest with Midjourney? Get ready to put on your Jacques Cousteau hat and a yellow raincoat, because this is going to be one exciting adventure! Now, let’s be honest, Midjourney might not be the most user-friendly tool out there. But I’ve got you covered with a detailed step-by-step guide to help you get started.
Keep in mind that Midjourney is likely to evolve quickly, so some details in the process below may change over time. If you have any questions, it’s worth checking out their Quickstart Guide for the latest updates and tips. Now, let’s dive in and unleash the potential of Midjourney together!
1. Sign up for Midjourney via Discord
Head over to the Midjourney website and click on “Join the Beta.” You’ll then be redirected to another platform called Discord. If you’re not familiar with Discord, think of it as a community-based version of Microsoft Teams but for hobbies and fun activities. Within Discord, Midjourney operates as a bot in a chat format, making it easy to interact with, a bit like ChatGPT.
After signing up for Discord, you’ll land directly in the bustling Midjourney Discord channel where all the action happens.
2. Select the subscription plan that suits you
Midjourney has three subscription tiers to choose from. The Basic Plan, starting at $10 per month (when paid annually), offers an excellent entry point. As you move up to the Standard, Pro, and Mega Plans, you gain access to more features and increased image generation time, with varying price points.
Here’s the interesting part: instead of paying per image, you pay for the time the AI tool works its magic. How cool is that?
For example, I’m currently on their Basic monthly rolling contract plan, which costs $12 and allows me to generate approximately 200 images every month. To keep track of my AI generation time, I can easily check the “minutes” remaining on my Midjourney account page.
Ready to subscribe? Just type the following command in the chat box: “/subscribe.” It will take you to the options mentioned above, and you’ll be well on your way to exploring the full potential of Midjourney.
3. Create your own Discord server and invite the Midjourney Bot
Alright, this might sound a bit complicated, but all you have to do is follow the steps. To create your own server in Discord just click on the big plus sign located on the left vertical bar. This will let you create a new server and pick a name for it.
Once your server is up and running, it’s time to invite the Midjourney Bot to join in on the fun! Here’s how: in Midjourney’s server find the Midjourney Bot in the Member List on the right column. If you can’t see it, you may have to toggle the people icon ”Show User List.” Click on the Midjourney Bot and then click on the button “Add to Server.” It will let you choose your server from the drop down menu. You’ll need to authorise and confirm that you’re adding an external application.
Having your own server provides a super convenient and private space to interact with the AI and generate images. No need to worry about distractions from a crowded chat room where everyone can see what you’re doing — it’s all about focusing on the task.
Oh, and here’s a pro tip: within your server, you can create different sub-channels like #interiors, #architecture, #sketches, and so on, to keep your workstreams nicely organized. Believe me, it can get a bit messy if you don’t.
4. Master the “/imagine” command for image generation
The “/imagine” command is like your magical gateway to AI-generated images. When you’re on your server and selected a channel (if applicable), just start typing “/” on the message bar and a menu will pop up. From there, you can either click on “/imagine” or type it out yourself. Once you hit the space bar after the command, a handy label called “prompt” will appear, inviting you to write your desired description. We’ll delve into prompt tips in more detail later.
After you’ve crafted the perfect prompt, hit enter, and your task will join the queue. Soon enough, the AI will start working its magic, generating four initial thumbnail images based on your prompt. As the images take shape, you’ll see a percentage indicator to keep you in the loop. Later on, I’ll walk you through how to choose one, enlarge it, edit it and download it. But first, let’s master the mysterious art of Le Prompt!
The craft of “Prompt Engineering” for interior inspiration
To truly unleash the full potential of Midjourney, you need to master the art of “prompt engineering.” Crafting a well-thought-out prompt forms the foundation for AI to generate images that perfectly mirror your creative vision. Think of it as creating an artful blend of words that vividly describes the mood, style, and aesthetic you want to achieve — like poetry without the need to rhyme.
Now, here’s a crucial aspect. Midjourney thrives on understanding as much information as possible. So, think of the prompt as having two essential parts:
- WHAT is it that you want to see?
- HOW do you want to see it?
Being conscious of these two elements will empower you to write effective prompts that yield amazing results.
Steal my interiors prompts template
To create an effective prompt, consider the following factors which derive from the what and how mentioned above:
– Medium: Determine the artistic style you desire, whether it’s a photograph, sketch, 3D render, watercolour, oil painting, ink drawing, or illustration.
– Subject: Describe the key element you want to design, whether it’s a room interior, a furniture piece, a house exterior, or a beautiful garden. Do not add too many furniture references (around three or so).
– Style: Specify the size, decorating style, colour scheme, accessories (plants, books, etc.), materials (wood, stone, fabric), and textures you envision for your space. Include at least two texture references.
– Lighting: Set the mood with lighting descriptions, such as morning light, afternoon sun, golden hour, indirect bright diffuse lighting, artificial lighting, studio lighting or dark moody lighting.
– Colour: Define the colour palette or photo filter style, such as warm tones, cold tones, monochrome, muted, or even specify a photography film effect (Kodak E200, Polaroid, etc.).
– Mood: Emphasize the desired ambience, whether it’s calm, energetic, busy, serene, cluttered, cosy, elegant, happy, or nostalgic. This is key to making a space look real.
– Composition: Specify the perspective and view of the image, such as close-up, room view, eye level or bird’s-eye view. You can even specify a camera lens type (50mm, wide-angle, bokeh effect, etc.)
Here’s another pro tip for using Midjourney effectively: the elements you include at the beginning of your prompt carry more weight. In other words, Midjourney pays closer attention to these “must-haves.” The elements mentioned towards the end of the prompt are considered more as “nice-to-haves” or suggestions.
To ensure consistent and accurate results, make sure to mention important details like the type of medium (e.g., photograph) and camera angle (e.g., eye level) right at the beginning of your prompt.
Adding parameters to your prompt
Let’s talk about parameters — the handy add-ons you include in your prompt to tweak the image in specific ways. You simply add them at the end of your prompt before generating the image. There are two essential parameters you should know about: aspect ratio and stylise factor.
The formula for each parameter is: [hyphen]+[hyphen]+[parameter]+[space]+[number]
Note some devices display double hyphens as a longer hyphen, and that should also work.
Aspect ratio
By default, all images have a square shape (1:1 aspect ratio). You can customize the aspect ratio of the images using the “–aspect” or “–ar” parameter plus your desired number before generating them. There are unlimited aspect ratios to choose from, like 3:2 (standard landscape), 5:4 (also landscape), 16:9 (cinematic), 2:3 (standard portrait), 4:5 (Instagram post), and 9:16 (Instagram reels, TikTok).
Stylise factor
The default stylise factor is always set at 100, but the range goes from 0 to 1000. Want more detailed and artistic results? Add the stylise factor to 1000 (use “–stylize 1000”, US spelling). This will make Midjourney go the extra mile in adding detail to the image. Keep in mind that while this might work wonders for some images, it may not be as effective for others. So, feel free to experiment and find what works best for you.
My golden tips for AI success
I’m all about helping you generate the most amazing interior images. Your unique design curiosity paired with my best tips is a recipe for success. So, I’m not holding back any secrets here. Let’s make your AI images pop with these golden tips. Power to the people!
Golden Tip #1: When crafting your prompt, sprinkle in words like “editorial-style photograph,” “award-winning interior photograph,” “Architectural Digest cover photograph,” “professional interior design photograph,” “4K,” and “hyperrealistic.” These additions increase the chances of getting those high-quality images you’re after.
Golden Tip #2: For extra credibility, consider adding location and time period details to your prompts. Think “in a London townhouse,” “in a Parisian loft,” “in the 1980s,” “in the 1920s,” and so on.
Creating the perfect prompt may require a bit of practice and experimentation, but trust me, it’s totally worth the effort. With a well-crafted prompt, Midjourney will bring your design vision to life in ways that exceed your wildest expectations — and I’m not exaggerating here.
Exploring the image generation process
Once you’ve carefully crafted the perfect prompt and triggered the “/imagine” command, the Midjourney Bot springs into action, generating a set of four initial images based on your description. This is where the magic of AI takes centre stage, as the images reflect the intricacies of your prompt and the creative brilliance of the generative model.
Now, here comes the exciting part — as you have several options to explore! First, you can download one of the generated images if it perfectly captures your vision. But hey, if none of them quite hit the mark, you can create further variations or even “re-roll” the results to fine-tune them to your liking.
Enable Remix in settings for easy prompt editing
The Remix feature in the settings allows you to edit your prompt before creating new variations without the need for copy-pasting. This streamlines the process and enables seamless adjustments to achieve the desired result. On the message bar, type “/settings” to display all the options and ensure the button Remix is turned on.
Re-roll to create completely new images
If you’re not entirely satisfied with the first batch of photos you can simply click the “re-roll (🔄)” button to generate four new images. Embrace this as part of the creative process — it’s an opportunity to fine-tune your prompt and discover even better results. So, don’t hesitate to experiment a bit until you’re happy with the outcome.
Creating variations
Creating variations is pretty much essential. If the initial images don’t quite match your vision but one comes close, you can easily generate variations based on that image. Just select the “V” button with the corresponding image number, and the bot will create four new preview images, closely related to your chosen one.
Upscaling, tweaking and downloading an Image
To download an image, you’ll need to enhance its resolution from its initial thumbnail size (upscale). Under the four generated images, simply click the button “U” followed by the corresponding number of your desired image. For instance, U3 if you fancy the bottom left image. This initiates a new task for the bot, and once completed, you can click on the image, select “open in browser” (small text below the image in the new browser tab) and then download it to save on your computer. Voila!
Beneath the upscaled image, you’ll find a set of buttons that allow you to further tweak the image. Each time you click on one of these buttons, a new task is generated with the adjustments you’ve chosen.
Here’s what each button does:
- 🪄 Vary (subtle): Makes minor adjustments to the image.
- 🪄 Vary (strong): Makes more significant changes while keeping the core idea intact.
- 🖌 Vary (region): You can select part of the image (via rectangle or lasso selection tool) and refine your text prompt to make localised changes.
- 🔍 Zoom: This lets you zoom in or out, or even choose a custom zoom level. You can also change the aspect ratio to square.
- ⬅️ Move view: Click on the arrow of your choice to expand the view in that direction. The AI will try to imagine what’s there based on the original prompt. Note that this may not always work well with interior photographs.
- ❤️: Save the image to your favourites.
- Web: Achieves the same effect as clicking on the image and selecting “open in browser” to download it.
The ability to upscale and tweak variations gives you the freedom to fine-tune the images and refine your design concept. Remember, experimentation is key, and going through a few iterations is normal to reach the desired outcome. Speaking from experience, it usually takes me around three to five variations to achieve that perfect result.
Complete sample workflow in Midjourney
Alright, now that we’ve covered the theory, let me walk you through a typical workflow in Midjourney to create one stunning image. Imagine we want to generate an interior photograph to share on Instagram. Here’s the step-by-step process I follow:
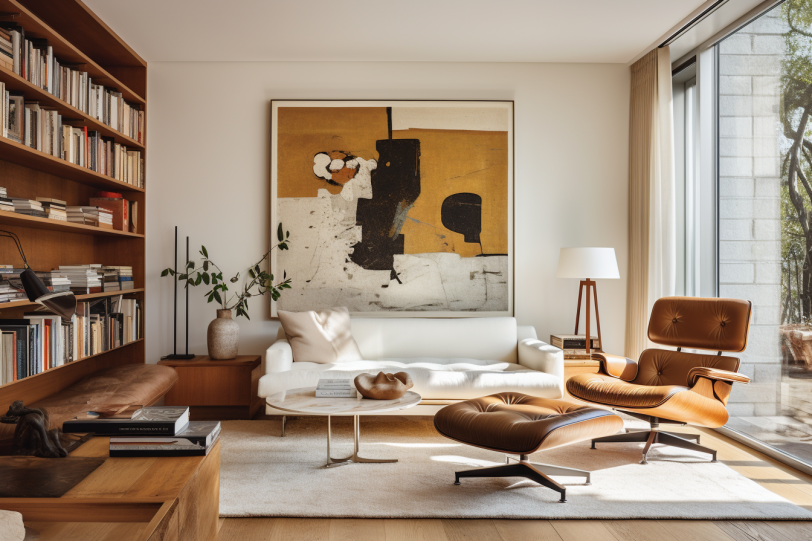
STEP 1 First, I think about what I want — an inviting portrait-oriented shot of a living room in an apartment with a Scandinavian style. And of course, I know exactly how I want it to look — like a professional interior photograph.
STEP 2 Now, it’s time to craft the perfect prompt, covering all the essential elements we discussed earlier. My initial prompt looks like this:
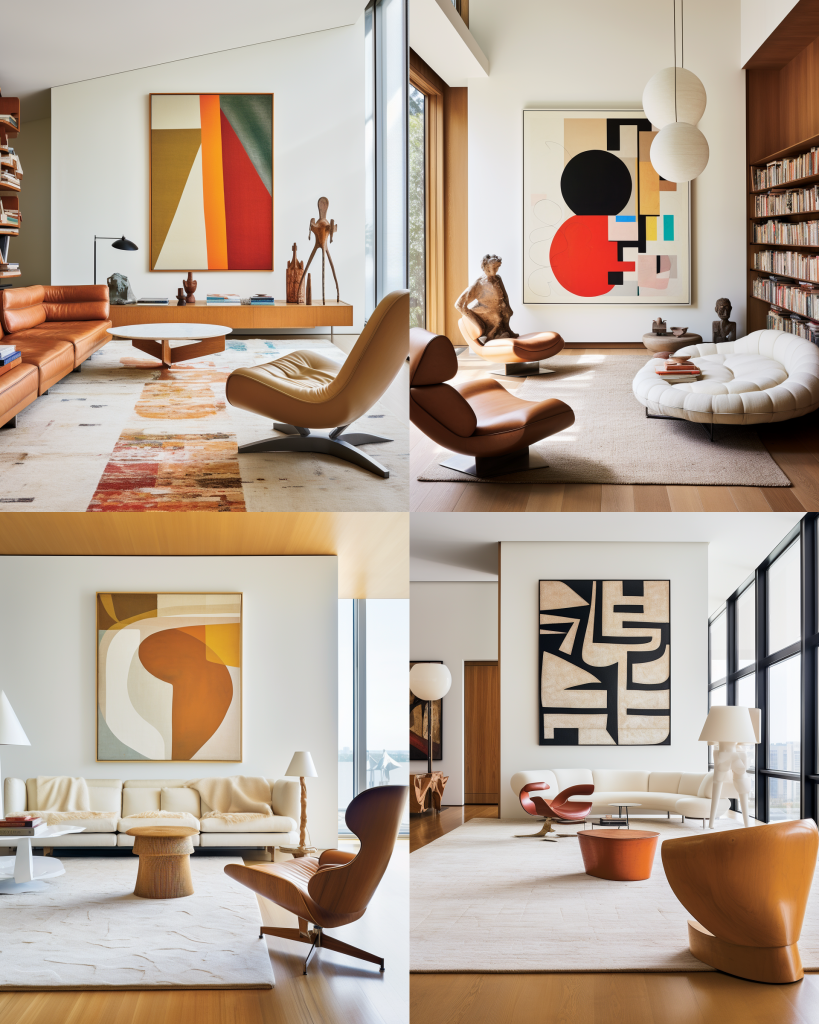
Architectural Digest cover interior photograph, corner section of a living room featuring a window, mid-century modern teak floor-to-ceiling shelving, large abstract art in the style of Frank Stella, a statement vintage tan leather chair, short pile white textured rug on the floor, oversized round rice paper shade hanging from the ceiling, natural pale wooden flooring, white walls, 19th-century apartment in Copenhagen, one large houseplant, golden hour, cosy and minimalist, eye level wall elevation shot, 4k –ar 4:5 –stylize 500
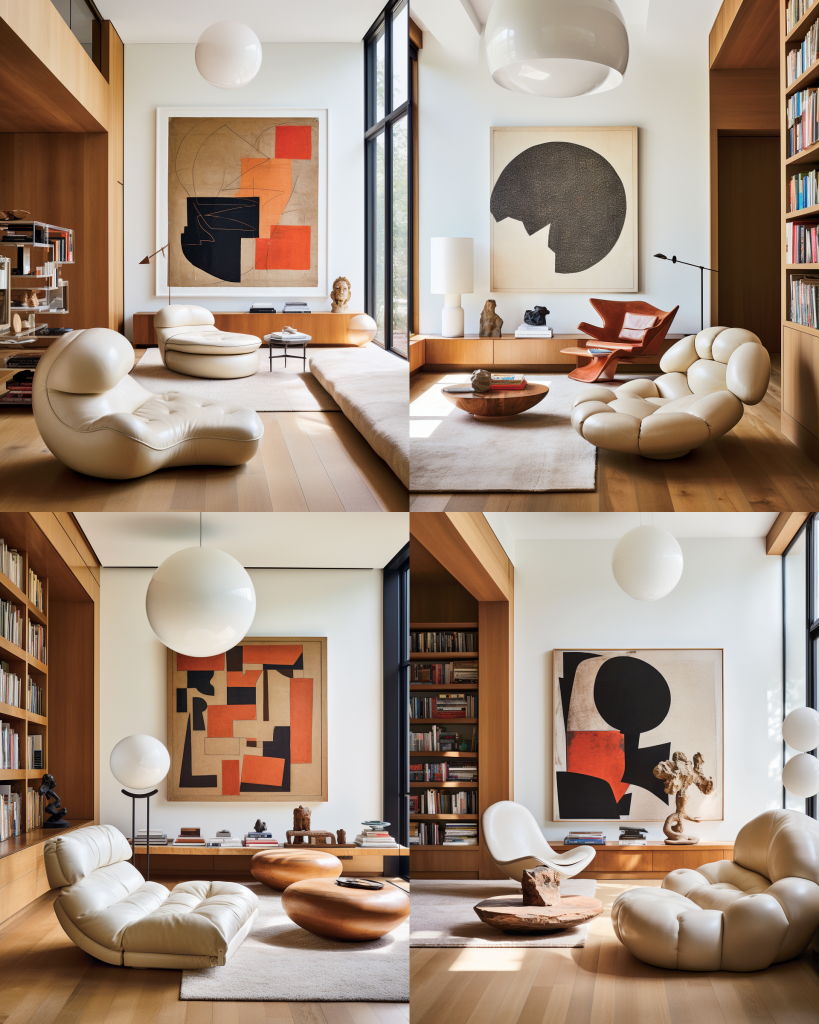
STEP 3 I ran the Midjourney Bot, and it generated four initial images. Not too bad, but here’s the thing — notice how the “Architectural Digest” part of the prompt creates a specific aesthetic, influencing the composition, contrast, and lighting. Since it’s placed at the beginning of the prompt, it can sometimes override other elements.
So, I decided to run a variation of the second image (V2) and tweak my prompt to better describe the pendant lamp and the apartment’s style.
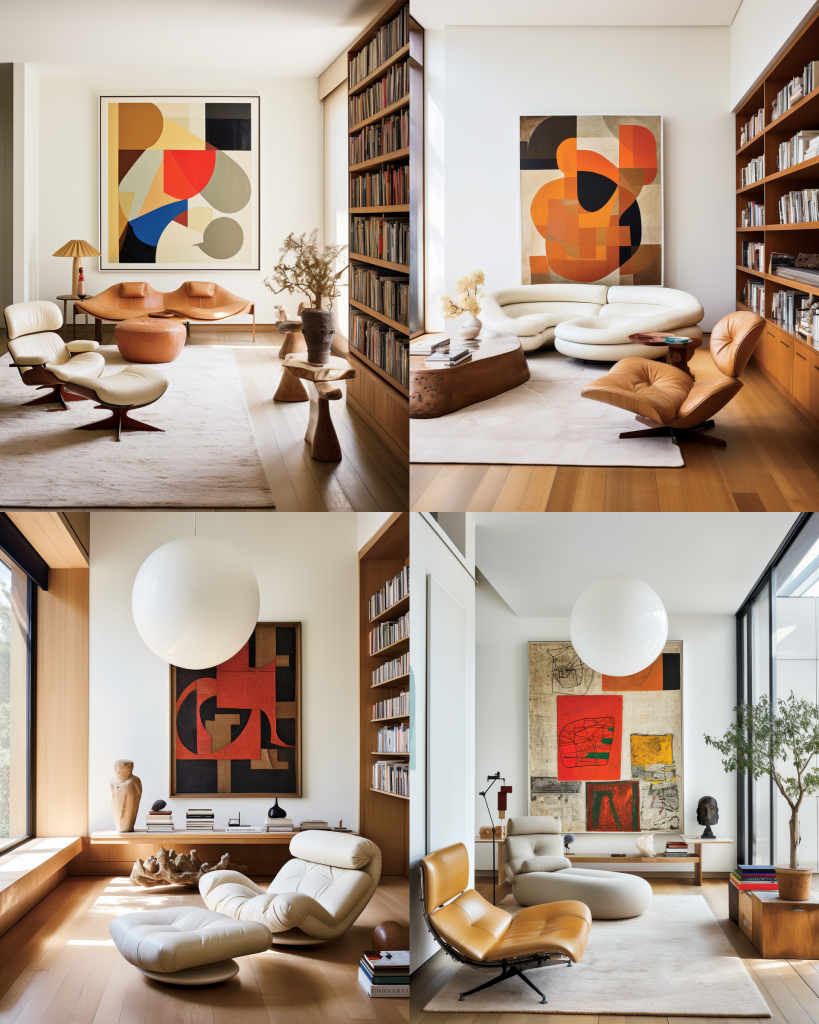
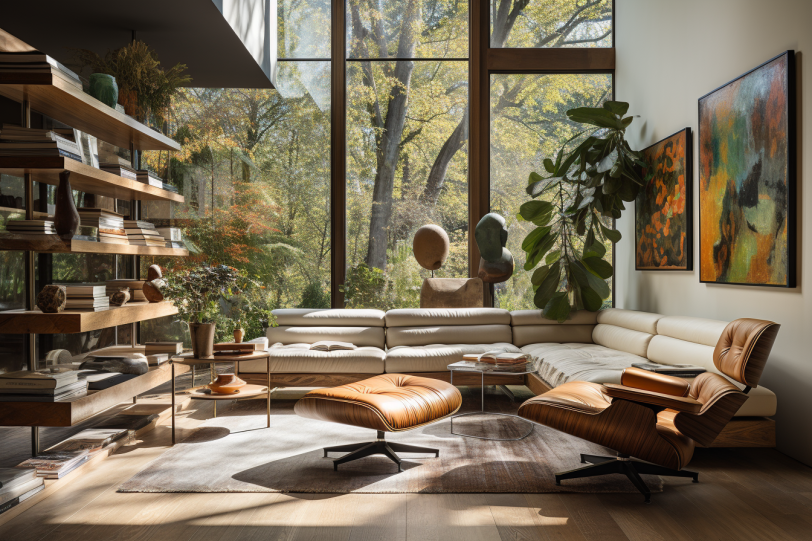
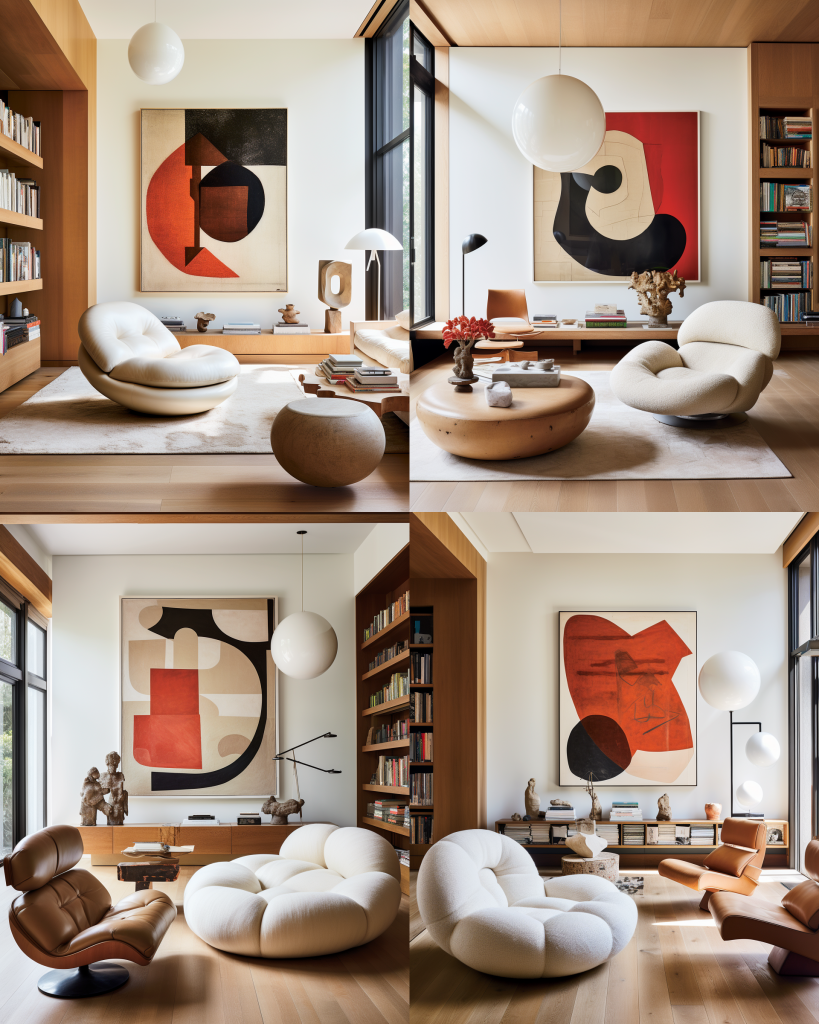
STEP 4 I really like the third one because it showcases the oversized lampshade that I’m after. So, I ran a few variations to see how things change (V3). They all look good, but none of them quite hit the mark. That’s when I decided to re-roll and get four new images to explore.
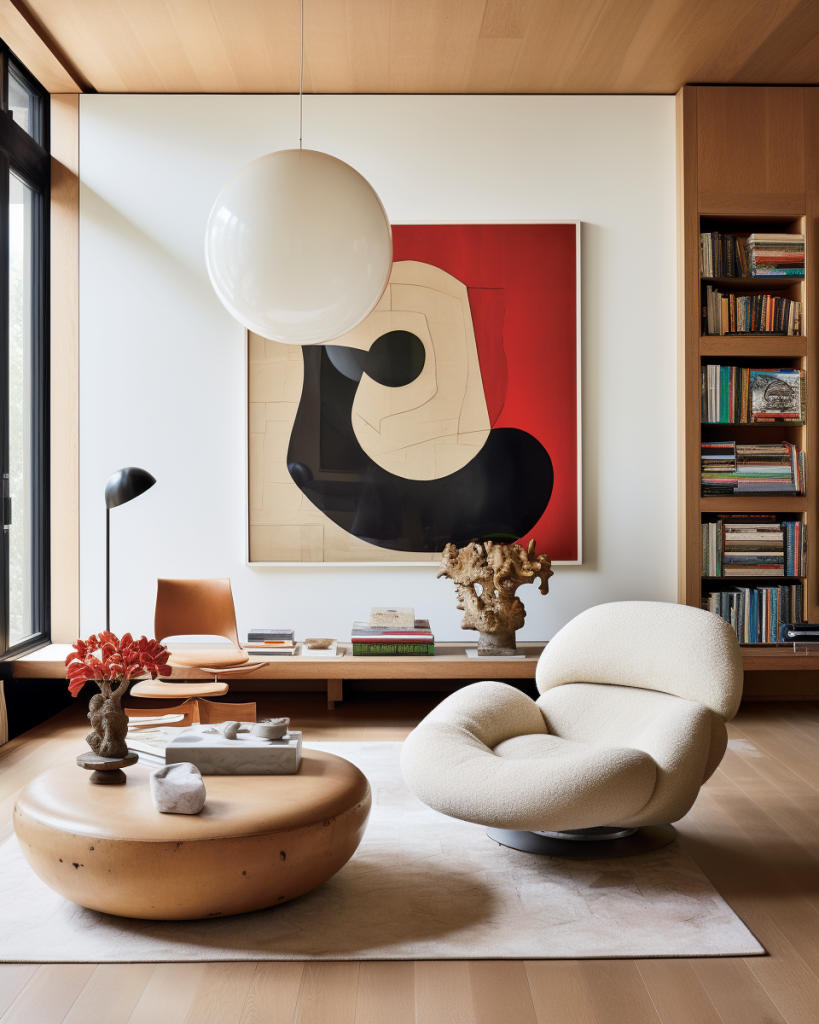
STEP 5 Ah, there we go! The second image from the new set is the winner. So, I decided to upscale it by clicking U2. But wait — here’s a little quirk. Some elements of my prompt were ignored by Midjourney — where’s my beloved plant? And the lighting isn’t quite that golden hour vibe I wanted. Again, it’s the “Architectural Digest” style taking the spotlight and overriding certain aspects.
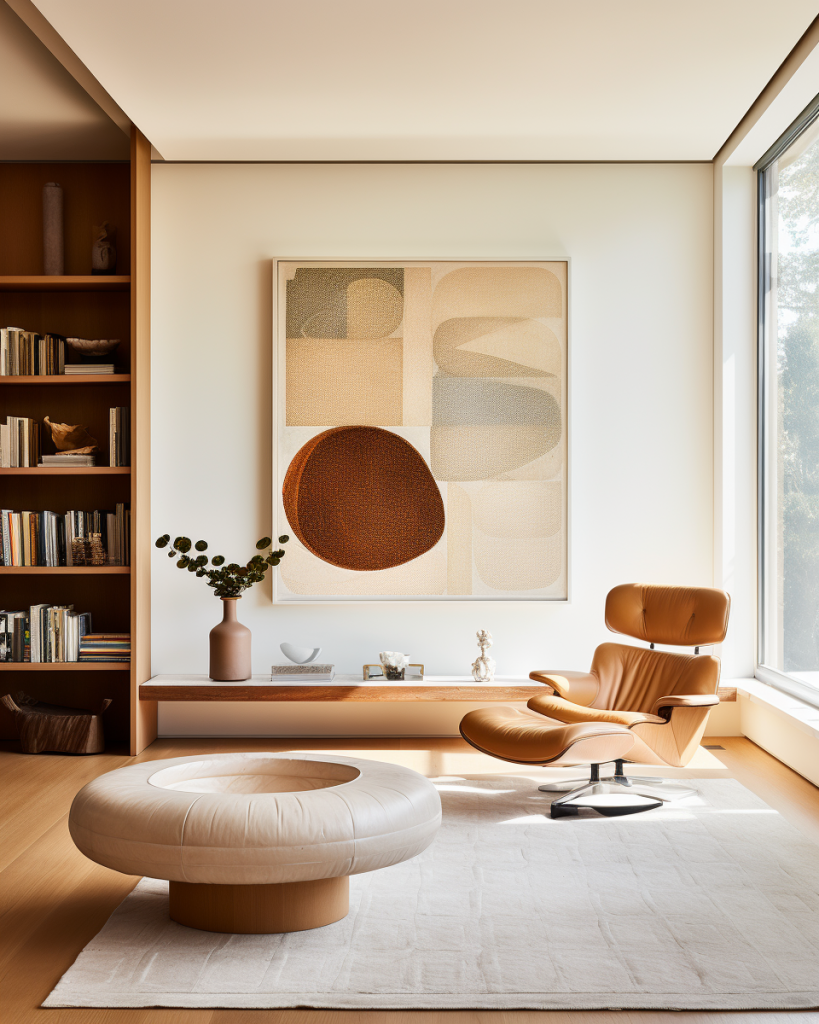
STEP 6 Although I like the above image, I thought, “Hey, let’s get experimental!” I edited my prompt and swapped out the above photographic style for “professional interior photograph” (without any reference to a magazine). Going back to the original four images, I ran variations of the third one (V3). After a couple more tweaks and re-rolls, guess what? I finally got this amazing image that I absolutely love!
I hope that going through this workflow, you can see that creating a good image is straightforward, but it does require several iterations and prompt refining to get closer to your original idea. The bottom line is, don’t hesitate to play around and experiment!
Embracing creative freedom with Midjourney
Midjourney’s AI technology is truly powerful, empowering you to explore imaginative concepts and push the boundaries of what’s possible. While the platform excels with prompts that make sense, don’t hold back from exploring wild and unconventional ideas. Architects and designers are already using AI to experiment with seemingly impossible volumes, materials, and locations, resulting in buildings that belong to the realm of dreams yet appear astonishingly realistic.
Take a moment to explore Midjourney’s community feed, where you’ll find some of the most incredible creations that go beyond interiors.
Picture yourself creating a futuristic living room on Mars or a whimsical underwater bedroom. With Midjourney, you can bring these imaginative concepts to life and see them visually represented with incredible detail.
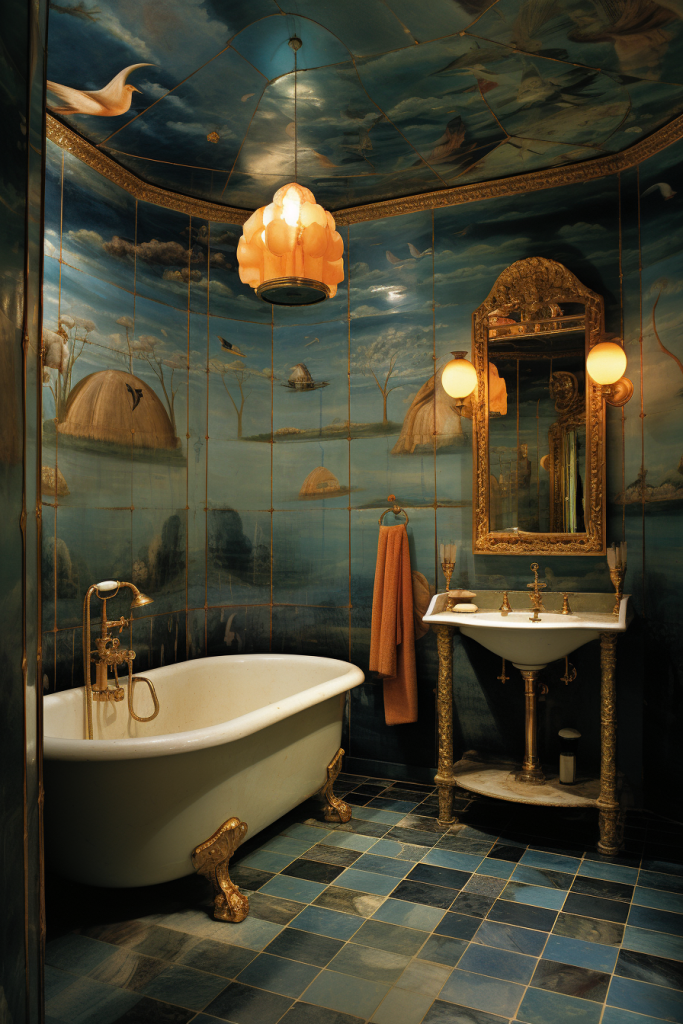
Dare to envision rooms inspired by great masters of the arts. What would a kitchen look like if it were inspired by Picasso? A bedroom in the style of Van Gogh? How about a Dali-esque decadent bathroom? You can also blend decorating styles that defy conventional design norms. The only limit is your imagination (and, okay, a few banned words). So, go ahead and let your creativity run wild!

Am I really designing with Midjourney?
Ah, the question of whether I’m truly designing with Midjourney is quite intriguing. In my opinion, the answer is no. While it’s incredible how easily I can create stunning interiors with even just a three-word prompt, true interior design is much more than that. It’s a creative and structured process that follows a precise brief, ensuring every detail is carefully considered.
As of now, AI cannot entirely replace the human touch in the design process, handling everything from plans to specifications. However, most of the tools designers use are incorporating AI elements to streamline the process and enhance their capabilities. For instance, automatic rendering of floor plans, elevations, and stunning visualizations of spaces are just a few examples of AI’s potential to become a designer’s trusty superhero buddy.
So, while AI can undoubtedly empower and assist designers, the essence of design still lies in the creativity, skill, and human touch that we bring to each project. Embracing AI as our creative sidekick opens up exciting possibilities for us to reach new heights in the world of design. And I’m all here for it!
Your next step with generative AI
Midjourney opens up a world of creative possibilities for home renovators. With the power of generative AI, visualising your dream spaces has never been easier or more inspiring. Say goodbye to endless searches on Pinterest and hello to a seamless process of crafting your own unique vision.
Now, I’d love to hear from you. Have you ventured into the realm of AI for interior design inspiration? Share your experiences and thoughts in the comments below. Let’s spark a conversation about the creative potential of AI in the world of home renovation.
By the way, I’m curious to know if you’re interested in a follow-up blog post. Would you like to explore more advanced tips and techniques to fully unlock the potential of Midjourney? If you are, let me know!
Meera
•2 years agoThis is an incredibly insightful post, Juan. I’d started reading up about Midjourney over the past few weeks, but none of the other information I found compares to the in depth guidance here, so thank you for writing this post! Bookmarking it, as I know I’ll come back to it for reference.
It’s mind boggling to think how far technology has come since the days of dial up internet during my teenage years! 🙂
Juan Sandiego
•2 years agoThank you so much for your comment, Meera! It’s a fascinating world indeed. This is just an overview of what you can do with generative AI. It’s the ultimate design inspiration sandbox!